News
Year of the Horse Lunar New Year Gift Guide February 10 2026
 Lunar New Year 2026 is the Year of the Horse
and begins on February 17, 2026!
The horse is the 7th animal among the twelve animal signs and fire is the element associated with this year's horse. Those who are born in the Year of the Horse are said to be resourceful, independent, cheerful and talented!
This year's Lunar New Year Gift Guide focusses on gifts and objects made by California-based, AAPI (asian american pacific islander) artists and makers. These individuals create and design modern, yet functional objects of art to be enjoyed all year round.
Celebrate the Lunar New Year by gifting one of these (or several) of these pieces to yourself or sharing with family and friends!
Here's all of the details with links on how to purchase:
1. Double Good Luck Charm with Double Jade Wu Lou - The good luck knot is an auspicious symbol of good fortune and prosperity, while the wu lou, or bottle gourd, represents good health, longevity, and prosperity.
2. Butterfly Lantern - Charming, traditional cellophane lanterns crafted by artisans in Singapore. Delight in these brilliantly painted and hand-formed butterfly lanterns.
3. Year of the Horse Baby Keepsake Block - A handmade, hardwood keepsake block celebrating baby's year of birth. Based on the chinese zodiac, each year is named after an animal with traits said to belong to those born in that year.
4. Zodiac Keepsake Block for Kids, Grownups - A hardwood keepsake block of your year of birth, based on the Chinese zodiac. Makes a great gift or keepsake for an older sibling, adopted child, someone special or even for yourself. Also use as a desk or room accessory.
5. Year of the Horse Card - A blank folded card printed on thick, 130lb paper produced from responsible sources. The card backside includes the characteristics of those born in the Horse year.
6. Peach Charm Bookmark - The peach is a sign of longevity and health. Perfect for everyday reading and for readers who love unique book accessories. Lightweight and easy to slip into novels, journals or planners.
7. Recycled Glass Horse Charm - The Horse Icon Charm is handcrafted from upcycled glass symbolizing strength, freedom, and forward movement. Available in vivid green and warm brown. Chain necklace sold separately.
8. Persimmon Tote Bag - The sturdiest tote ever to handle your everyday trips. Original design printed on100% cotton super heavy weight canvas.
9. White Rabbit Candy Art Print - A rich, 3 color, limited edition and signed risograph. 8.5"x11" sizing.
10. Tangerine Key Chain - Acrylic bag charm/ keychain and a symbol of luck, wealth and prosperity.
11. Horse Waffle Tee - Three horses circle in continuous motion, symbolizing the year of the fire and the balance of yin and yang energy. Featuring the original artwork of Estelle Tcha of eee Studio.
Enjoy this Lunar New Year and Year of the Horse Gift Guide!
Mocha Mousse for 2025 December 16 2024

A few weeks ago, Pantone selected Mocha Mousse as its color for 2025. It's a warm, rich brown evoking a comfort feeling from chocolate and coffee.
The reaction online has been mixed. Some people love it and others want to take a pass. We've been into browns for some time. Many of our wall vase pattern variations and product offerings have a brown option which evoke an earthy, mid-century feel. We find mocha mousse can be used as both a dominant or accent color depending on your preference. This warm shade evokes comfort and warmth with a little bit of indulgence.
How do you feel about Mocha Mousse?
Products Pictured:
Checkered Mini Planter Pot
Framed Arch Wall Vase in Petals Pattern
Patchwork Scallop Tabletop Wall Vase
Holiday Gift Guide 2023 November 25 2023

We're loving color for holiday gifting! Color sets the mood for a happy room or home. Find inspiration and unique picks for the art, plant, gardening, and nature lover on your holiday shopping list!
Lunar New Year Modern Gift Guide 2023 January 03 2023
Unique, modern gifts lunar new year created by AAPI makers across the United States. Many of these goods are handmade and can be enjoyed all year long.Summer Playlist June 05 2022

My DIY Easter Tablescape April 09 2020
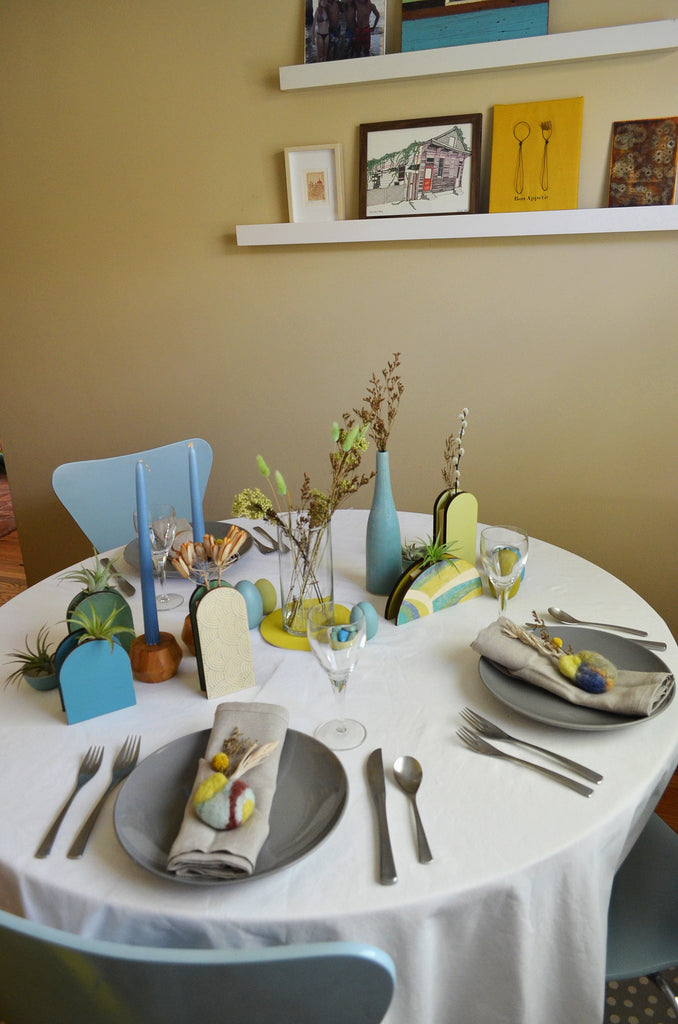
I was recently asked to create an Easter themed tablescape as part of a collaboration with a few local moms. To be honest, I had never made a tablescape as we tend to be a very casual family. Our house is small and so for most major holidays, we get together at other relatives’ homes. But with this corona virus thing happening this year, we will not be gathering with extended family so it was the perfect time for me to challenge myself in creating one.
First, I had to do a little research on Pinterest and Instagram to find out the common elements for a tablescape. Then, I wanted to be a resourceful as possible – use as many things and decorative pieces I already owned (plus access to in-person shopping is very limited now) as well as incorporate some of my own handmade goods to come up with a unique table vignette.

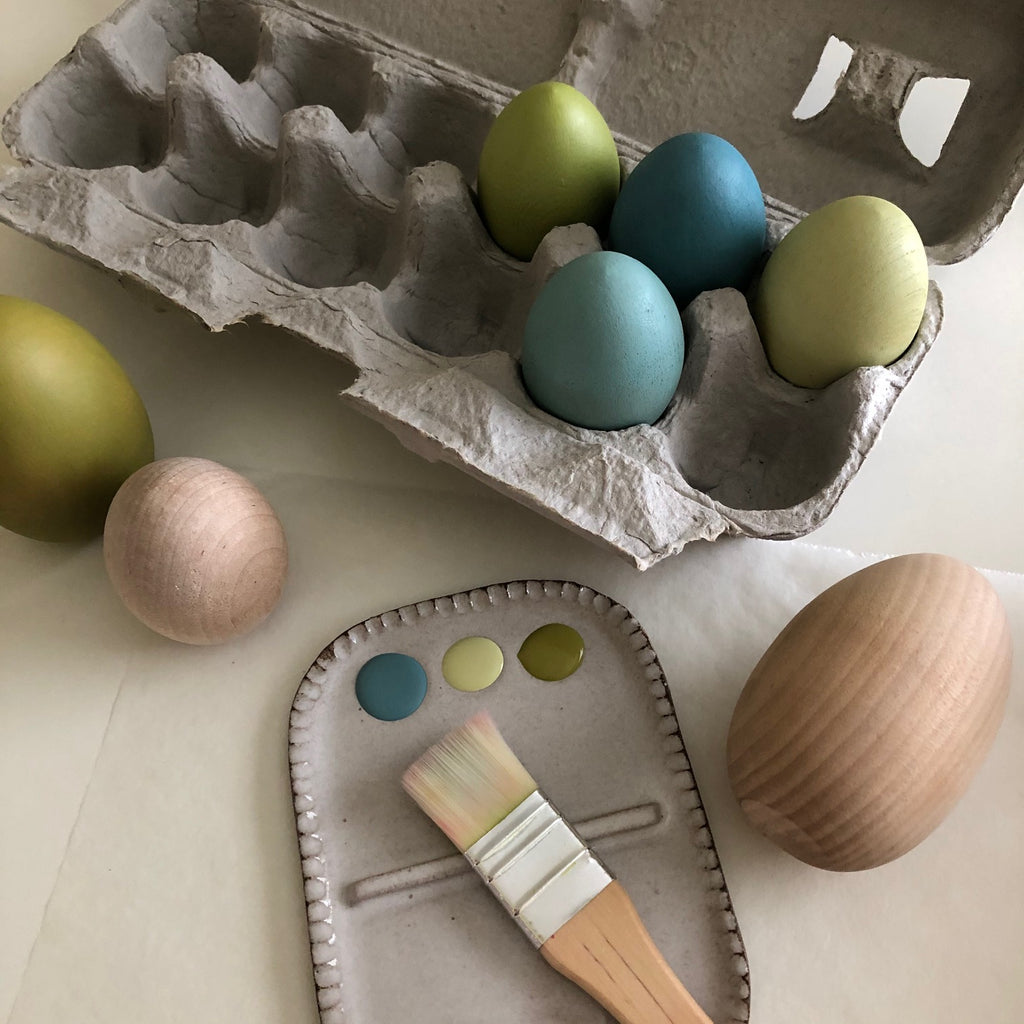
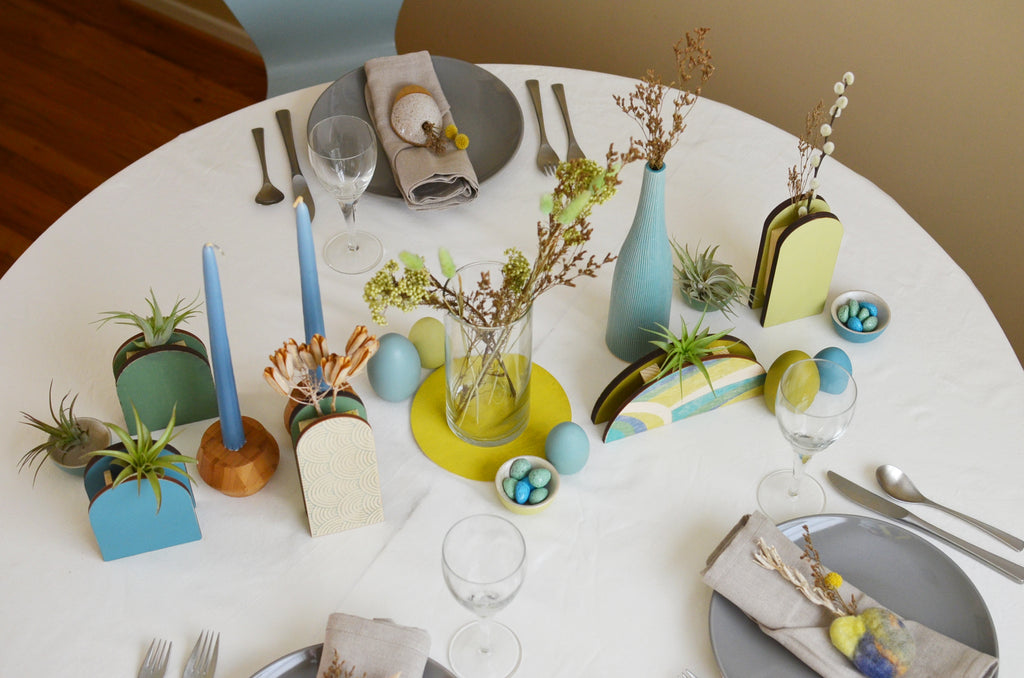
My Inspiration was to combine natural and wood elements as well as simple textures in a modern way. I also knew I wanted to use air plants and dried floral and also an eclectic assortment of plant decor, wood eggs, and bowls. For the color theme, I found myself drawn to blues and greens based on the colors of the dried floral and planters I had.
My goal was to be a resourceful as possible – to use as many things and decorative pieces I already owned (plus access to in-person shopping is very limited now) as well as incorporate some of my own handmade goods to come up with a modern table vignette.
Gathering My Materials and Supplies. This is what I used - basics from my home (a cream linen tablecloth, silverware, wine glasses, and grey plates (rescued from my son’s campus apartment supplies now that he’s moved back home temporarily). And for decor - stored blue candles and bamboo candlestick holders, a glass vase, painted wood eggs and mini bowls, dried floral, and air plants.

For the place settings, I used our everyday silverware and wine glasses. I did end up purchasing some linen napkins which can be used again and a few easter chocolates. I also used a few of these organically shaped felted planters (which I bought from a maker in San Francisco several years ago) filled them with a few dried flower sprigs to decorate each place setting. I think they looked lovely on the linen napkins.


This year more than ever, I am taking the time to make the Easter meal and our time celebrating the holiday an extra special moment. Just because we are homebound these days doesn’t prevent me from expressing my creativity!
DIY Photo Embroidery Project Tutorial March 29 2020

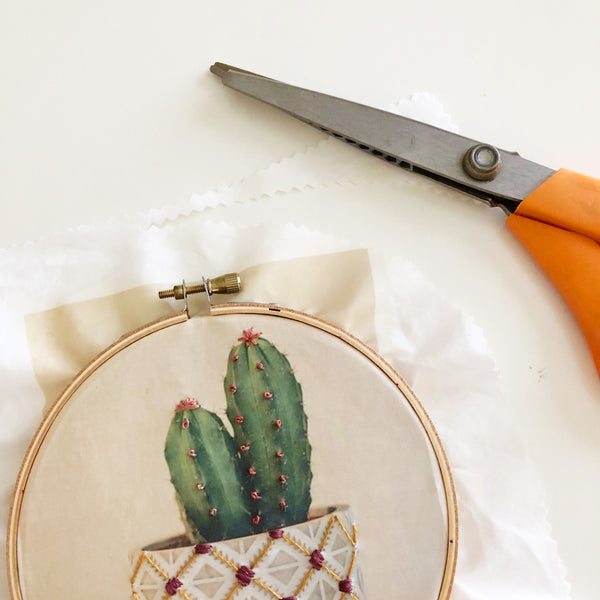
I've always wanted to try Photo Embroidery and with our recent Stay at Home order, I thought this was the perfect time to try. For those of you unfamiliar with Photo Embroidery, it's a technique for embellishing photographs with different types of stitching. I really love the dimensional feel it gives to both black & white as well as color photos. Follow along as I share how I created this lovely piece of affordable art.

Materials Needed:
Photograph (color or black and white)
Avery Fabric Transfer (for color Inkjet printers) - I used this one
Iron
Natural fabric (I'm using cotton but all linen works well too)
5" Embroidery Hoop, Embroidery Floss, Needle, Threader
Sharp Scissors - I love these mini, super, sharp ones
Step 1
Print out photo on Image Transfer Paper. Remember, image will be reversed when transfered onto fabric. Keep this in mind if you need to rotate the photo on your computer before printing.
Step 2
Follow the specific Image Transfer Paper manufacturer directions for ironing the image onto fabric. Use a dry iron (NO steam) at the highest temperature. Press fabric now if needed for a wrinkle-free surface. Place Transfer Paper with printed image facing down on fabric. Use long, firm pressure and long strokes over all edges, corners, and center to apply transfer to fabric.


Step 3
Remove adhered transfer from ironing board to cool for about 5 minutes. Gently peel back corner of transfer paper and remove entire paper backing.

Step 4
Select the embroidery thread colors you want to use for the project and gather a needle, threader (a must have for me), and scissors. Load and center embroidery hoop with cactus image. It's important not move or unload the embroidery hoop during stitching as the transferred fabric will be creased where the hoop is laying.

Step 5
Begin stitching. I chose to use 3 out of the 6 embroidery thread strands for each stitch color. I decided to start with french knots on the cactus and created a little flower on the cactus top with simple running stitches. Then I moved to the pot where I chose to do running stitches in a golden color to run over the diagonal patterns. The options for stitching and adding designs to the pot are endless. Make them as simple or as complicated as desired.


Step 6
Finishing your piece. Trim edges of fabric around hoop leaving about 1"- 1 1/2" border. Tip: Use pinking shears to prevent fabric from fraying. Finish with large running stitches and gather to pull fabric together.


Wow, wasn't that easy? Now you have a Photo Embroidery piece of art! I can't wait to hang mine in my studio office. I've created a very limited number of affordable Photo Embroidery kits for you to make one for yourself or to give as a gift. Grab one here in my shop. Happy Stitching!
New Wildflower Cards February 10 2020
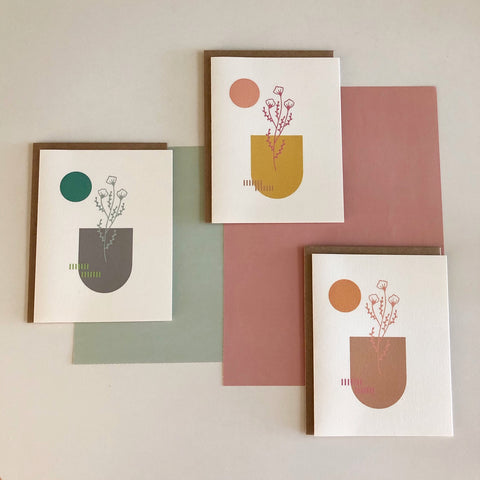
Yay! A new card release for 2020. Everyone's favorite wildflower series is now available in Everyday cards.
Printed on creamy thick acid-free paper produced from sustainable forests. Blank inside so you can write your own personal message. And includes a 100% recycled, kraft brown envelope.
Who's ready to write and send a beautiful card?
2019 Holiday DIY Gift Guide November 19 2019
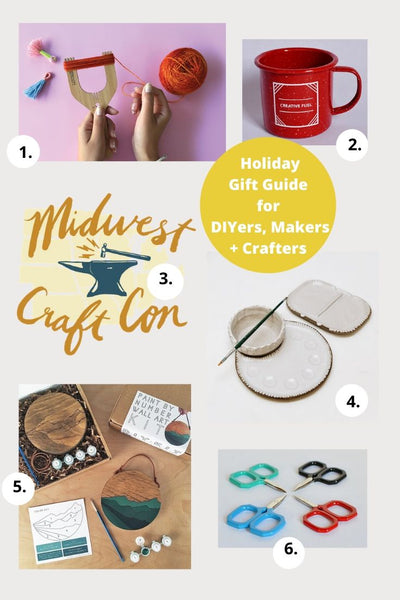
This year, I wanted to compile a holiday gift guide for people like me who are always looking for the coolest tool or product to use for making in the new year. These are unique, art-centric gifts for the creative person on your list (or even for yourself!). They are also goods from small, woman-owned businesses who I hope you will choose to support during the holiday season.
The list includes:
1. Pom Pom + Tassel Making Tool - The perfect must-have fiber craft and DIY tool! This all-in-one, tool can make pom poms, tassels, friendship bracelets, cords and small weavings. Create stunningly simple fiber, tassel, and pom pom projects in minutes.
2. Creative Fuel Mug - A bold red, vintage-styled enamel cup will have your creative juices flowing in no time. Holds 12 oz. of your favorite hot or cold beverage. Makes a great companion for camping and the beach.
3. Midwest Craft Con - An all inclusive, conference and retreat for craft enthusiasts and creative entrepreneurs with a full range of educational classes and DIY hands-on workshops in a variety of mediums taught by professional makers/artists. February 28 - March 1, 2020 in Columbus, OH.
4. Ceramic Paint Palette Set - The perfect gift for the aspiring artist or experienced painter. Beautifully, hand-built in Nashville, TN with cone 6 stoneware. Use with any type of paint and it will wash away stain free.
5. Wood Paint by Number Wall Hanging Kit - A new, modern take on DIY paint-by-number! When complete, you'll have a piece of art that's ready to hang or gift.
6. Tiny but Mighty Scissors - They may be tiny but they're definitely mighty and super sharp. Great for all kinds of sewing projects, cutting yarns, embroidery threads and even those annoying clothing tags. Airplane friendly too!
What are you waiting for? Start shopping now!
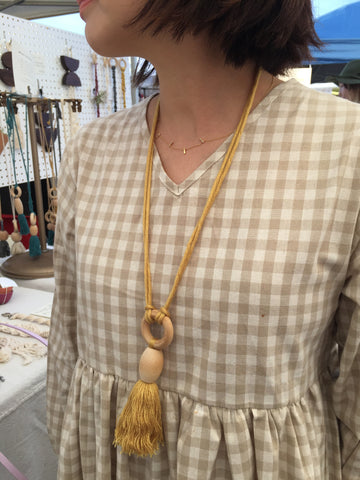
What to Wear with Leith + Maeve Necklaces November 04 2019

We feel it. time to start transitioning the wardrobe to fall. Many people have asked, "What kind of outfit goes with your Leith + Maeve necklaces? Here's our roundup of outfit inspiration to take you though the fall and winter seasons.
With a Dress - A simple dress can be styled with a contrasting Leith necklace.
Our Leith + Maeve necklaces add texture and color to your casual, everyday outfits. Now available throughout the country at some of our favorite, independent businesses - Spoils of Wear in St. Paul, MN and Citizen Supply in Atlanta, GA.
My Wood + Fiber Necklace Story June 13 2019
Several months ago, I started making necklaces. Yes jewelry! My decision to branch into necklaces was not on purpose. In fact, my necklace making happened by accident while I was experimenting with new materials and tools.
As many of you know, I teach a monthly creative workshop at several local libraries. Each month, I develop, create and teach a new workshop project. While it's easy to duplicate the latest or hottest craft trend into a project, I prefer to design projects and workshops which are new or have my own original spin on the craft. So I started making macrame necklaces using some thin cotton cording I had purchased for another project.

The macrame necklaces were different and I knew that they could potentially be a workshop project that people would like. Plus I knew my unique take on the macrame pendant had never been taught before.
Then, I began experiementing with tassel making and used The Loome tool to perfect my tassels with the goal of teaching a tassel workshop at the libraries. My tassel making became obsessive and I combined a few wood beads which I had in my supply stash to create a few wood + fiber necklace prototypes.

Well my fiber necklace workshop was a hit and people started asking if they could buy the necklaces I had made. I began making more tassels in new colors and brought the necklaces to several retail shows were they were very well received.
My first collection of wood + fiber necklaces is now available on my website. Take a look at all the wonderful colors they are available in right here.
Year Round Community Making Workshops - Join Us! April 10 2019
This year, there have been lots of opportunities for community making! So there's no excuse not to join us. Many workshops are free (or nearly free) and others that paid are priced to be accessible to almost everyone. In January, I taught a Valentine's Day themed embroidery workshop with Gather + Make, a new creative gathering group started by my friend and landscape designer Angela Price.
Then in February, I collaborated again locally with Lou + Grey in El Segundo, CA for a brand new, never before offered workshop combining our love for wood + fiber. We made the coolest, boho-inspired, macrame and tassel necklaces. They came out wonderfully!
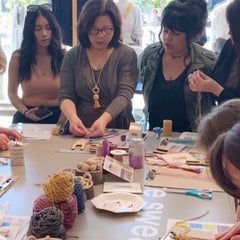

A few weeks ago, I got together with small business Neepa Hut and Bar Nine coffee in Culver City, CA for a free, mini macrame make + take.
Have a little FOMO (fear of missing out)? No worries, there are still many more upcoming opportunities for making this year.
In May, I will be going to the beautiful, Wayfarers Chapel in Palos Verdes to teach a boho-inspired, tassel wall hanging workshop on Saturday, May 18. This is a new collaboration with the greater Wayfarer community. For more information and to register, please visit the chapel's facebook events page.

In June, I will be going to the OC (orange county) to teach a workshop with the Brea Gallery The Gallery hosts four major exhibits each year and has recently announced a series of modern making workshops. I will be teaching Macrame Air Plant Hangers and hope you can join in. More information and registration here.
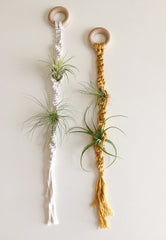
Lastly, join me at monthly crafting events at the Cerritos and Torrance Civic Center Libraries. Every month, I lead an weekday evening adult crafting/diy workshop at the Cerritos Library. This year's upcoming creative projects will include pamplet stitch book making, modern air plant fiber wall hangers and more. Check out the Torrance library's monthly event calendar for specific dates, times and project themes. Contact the library directly to register.
Which workshop event are you coming to? Can't wait for you to gather and create with us!
- Page 1 of 4
- Next